 简体中文
简体中文 English
 русский
 Español
Fubang is a professional manufacturer specializing in the design, production and sales of stainless steel chains.
Our A series short pitch precision roller chains comply with various international standards and are...
See DetailsContent
Removing a chain link from a conveyor chain requires identifying the master link or using a chain breaker tool to push out a pin, then separating the two ends. The entire process typically takes under 10 minutes when the right tools are on hand and the chain type is known in advance. Whether you are shortening a chain, replacing a worn section, or performing routine maintenance, understanding the correct removal method prevents damage to the chain and keeps your conveyor running efficiently.
Not all conveyor chains are built the same way, and the removal method depends directly on the chain type. Using the wrong approach can bend side plates, damage pins, or force you to replace more links than necessary.
The three most common categories found in conveyor systems are:
Before starting any removal, check the chain pitch (the distance between pin centers). Common pitches are 1/2 inch (12.7 mm), 5/8 inch, 3/4 inch, and 1 inch. The pitch determines which chain breaker size you need.
Gathering the correct tools beforehand avoids mid-job delays and reduces the risk of injury or chain damage.
If you plan to reuse the chain, avoid using a punch and hammer in place of a proper chain breaker. Hammer strikes frequently bend the inner plates or mushroom the pin end, making reassembly impossible without replacing additional components.
The master link (also called a connecting link) is a removable link installed intentionally to allow easy chain separation without special tools. Most roller conveyor chains include a master link, and locating it first saves significant time.
Cotter pin master links are common on heavier-duty agricultural and industrial conveyor chains with pitches of 1 inch or larger. Do not reuse the old cotter pin after removal; new ones cost very little and provide a secure connection.
When a chain has no master link, or you need to remove a specific damaged link mid-chain, a chain breaker tool is required. This method works on virtually all roller and attachment conveyor chains and leaves the surrounding links undamaged if done carefully.
Industry practice recommends breaking the chain at an inner link rather than an outer link wherever possible. Inner link pins are easier to press out cleanly, and the connector link used for reassembly fits over the exposed inner plate pins without additional modification.
| Method | Tools Required | Skill Level | Reusable After | Best For |
|---|---|---|---|---|
| Clip master link | Screwdriver, pliers | Beginner | Yes (new clip needed) | Routine maintenance, light-duty chains |
| Cotter pin master link | Needle-nose pliers | Beginner | Yes (new cotter pin needed) | Heavy-duty and agricultural chains |
| Chain breaker tool | Chain breaker sized to pitch | Intermediate | Partial (connector link needed) | Chains without master link, mid-chain damage |
Removing the right link matters as much as using the right removal method. A common maintenance benchmark is to replace a conveyor chain when elongation reaches 1 to 3 percent beyond the original pitch length, depending on the application. For a 10-foot chain with 1/2-inch pitch, that is roughly 1.2 to 3.6 inches of total stretch.
Signs that a specific link or section needs removal include:
A simple field test: hold the chain horizontally at one end and observe how far it droops over a 12-inch span. Excessive droop combined with stiff links usually indicates the chain needs replacement rather than a single-link repair.
Removing a link is only half the job. Proper reassembly ensures the conveyor runs smoothly and the repair holds under load.
Replacing a single damaged link is a practical short-term fix, but replacing only one link in a heavily worn chain often leads to another failure within days or weeks. The new link will be stiffer and stronger than the surrounding links, creating an uneven load distribution that accelerates wear on adjacent links.
Full chain replacement is the better choice when:
In a production environment, an unplanned conveyor stoppage due to a second chain failure usually costs far more in lost output than the price of a full replacement chain.
Conveyor chains store significant mechanical energy even when the motor is off, especially on inclined or loaded conveyors. A few non-negotiable safety steps:
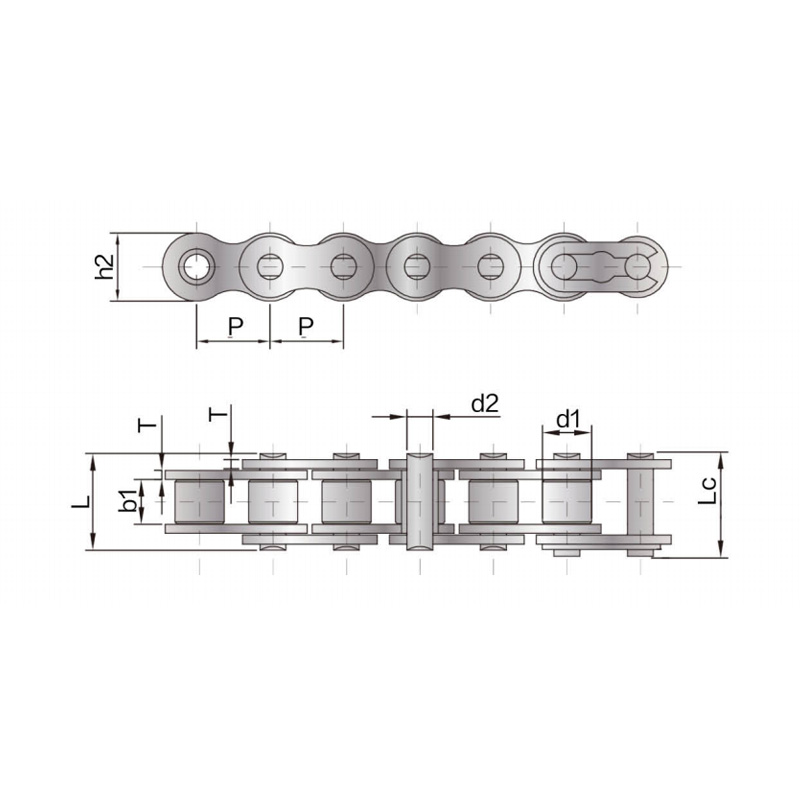
Our A series short pitch precision roller chains comply with various international standards and are...
See Details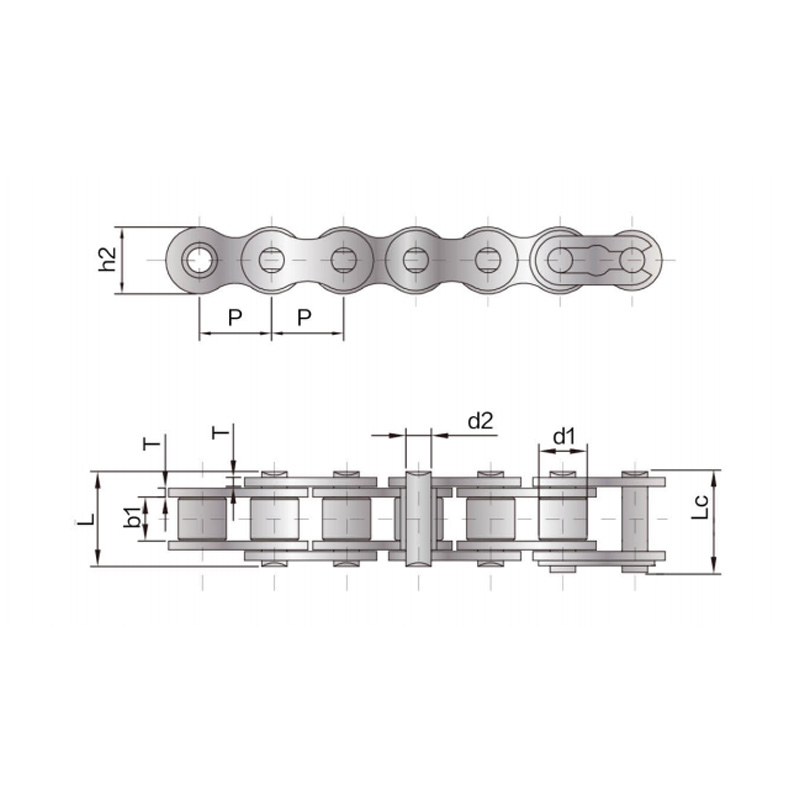
The tensile strength and fatigue strength of the B series short pitch precision roller chain reach 1...
See Details
The Heavy-duty precision roller chain adopts a thickened chain plate design based on the short-pitch...
See Details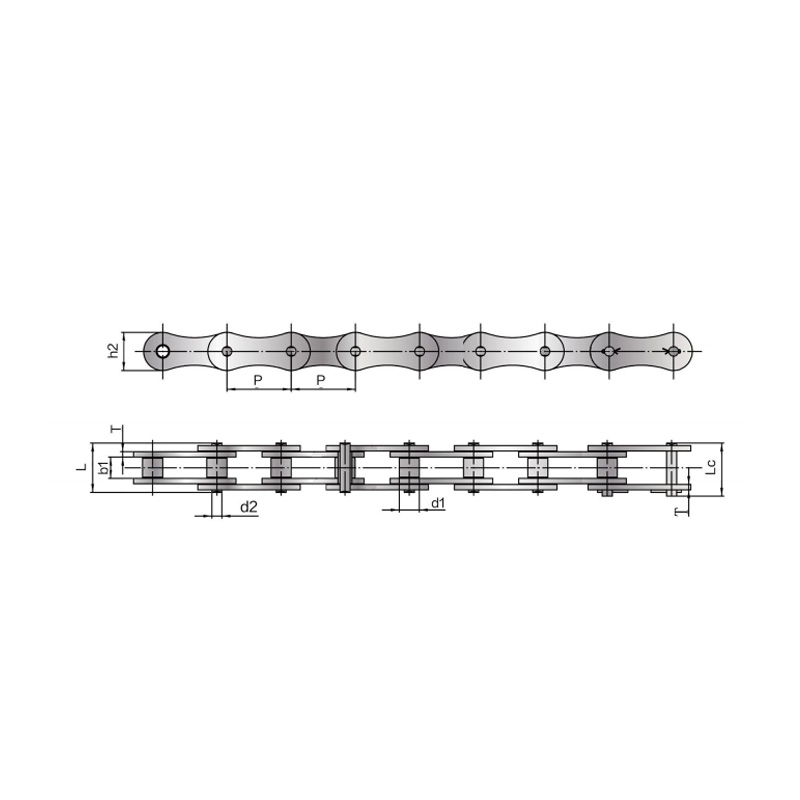
The double pitch driving chain complies with various international standards. The pitch of the doubl...
See Details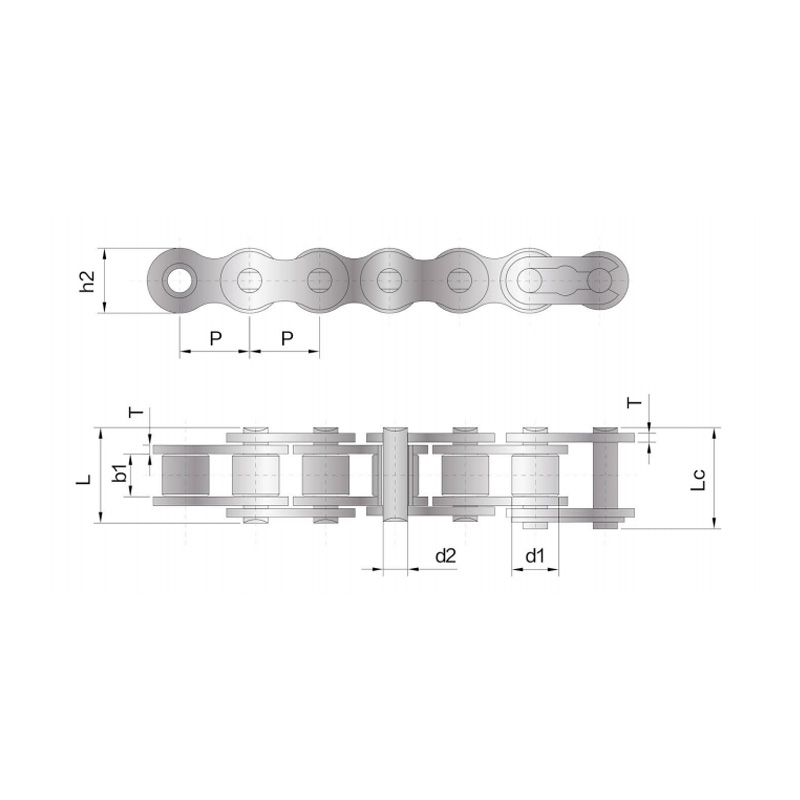
We also produce single row roller drive chains in more sizes and varieties. Customised products, sui...
See Details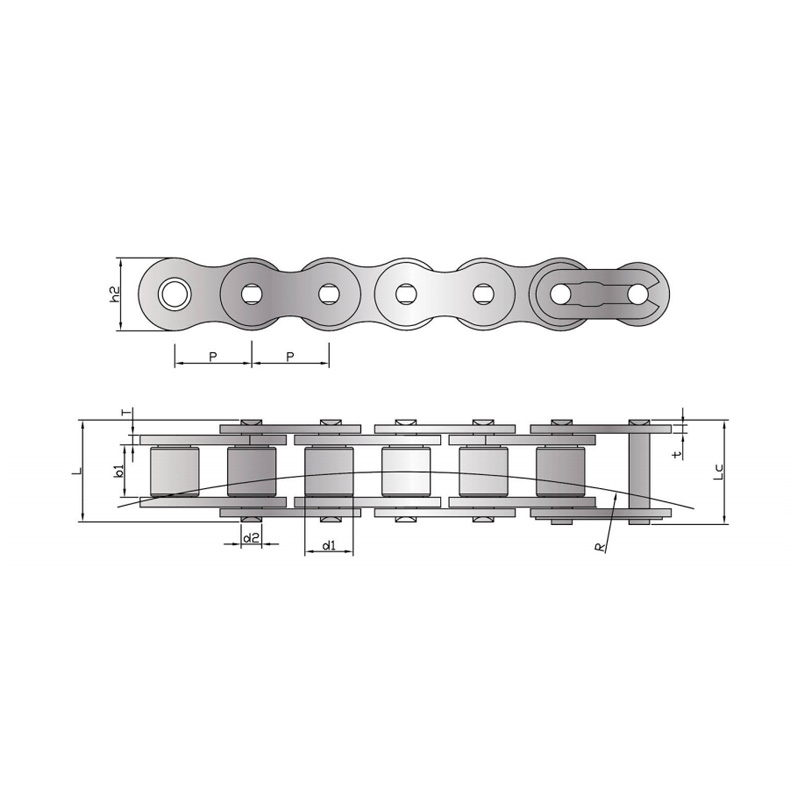
Side bow chain refers to changing the size of parts in the design of short-pitch precision roller ch...
See Details
The Anti-Sidebow chain for pushing window is a functional product with specially designed parts and ...
See Details
The A series short-pitch straight plate precision roller chain has a smaller pitch, a relatively lar...
See Details© Suzhou Fubang Machinery Chain Transmission Manufacturing Co., Ltd. Stainless Steel Roller Chains Manufacturers Conveyor Chains Suppliers
